

Large Scale DIY Art for under $100

What you need:
(4) 1x2x6 common board pine
(3) 1x2x8 select pine
(2) packs oak edge banding
pocket hole system or screws
Want to see the full video tutorial?
Come visit me on Instagram @abby_roadhome
Step 1: Build a frame.
First you want to build a frame for you tapestry or art. I use (4)1x2x6 pine common board planks for my frame. I made a very simple frame securing the pieces with pocket holes & screws as well as wood glue. This is the pocket hole system I use!
Make sure you make your frame smaller than the tapestry so that you can wrap the fabric around the sides and staple it later.

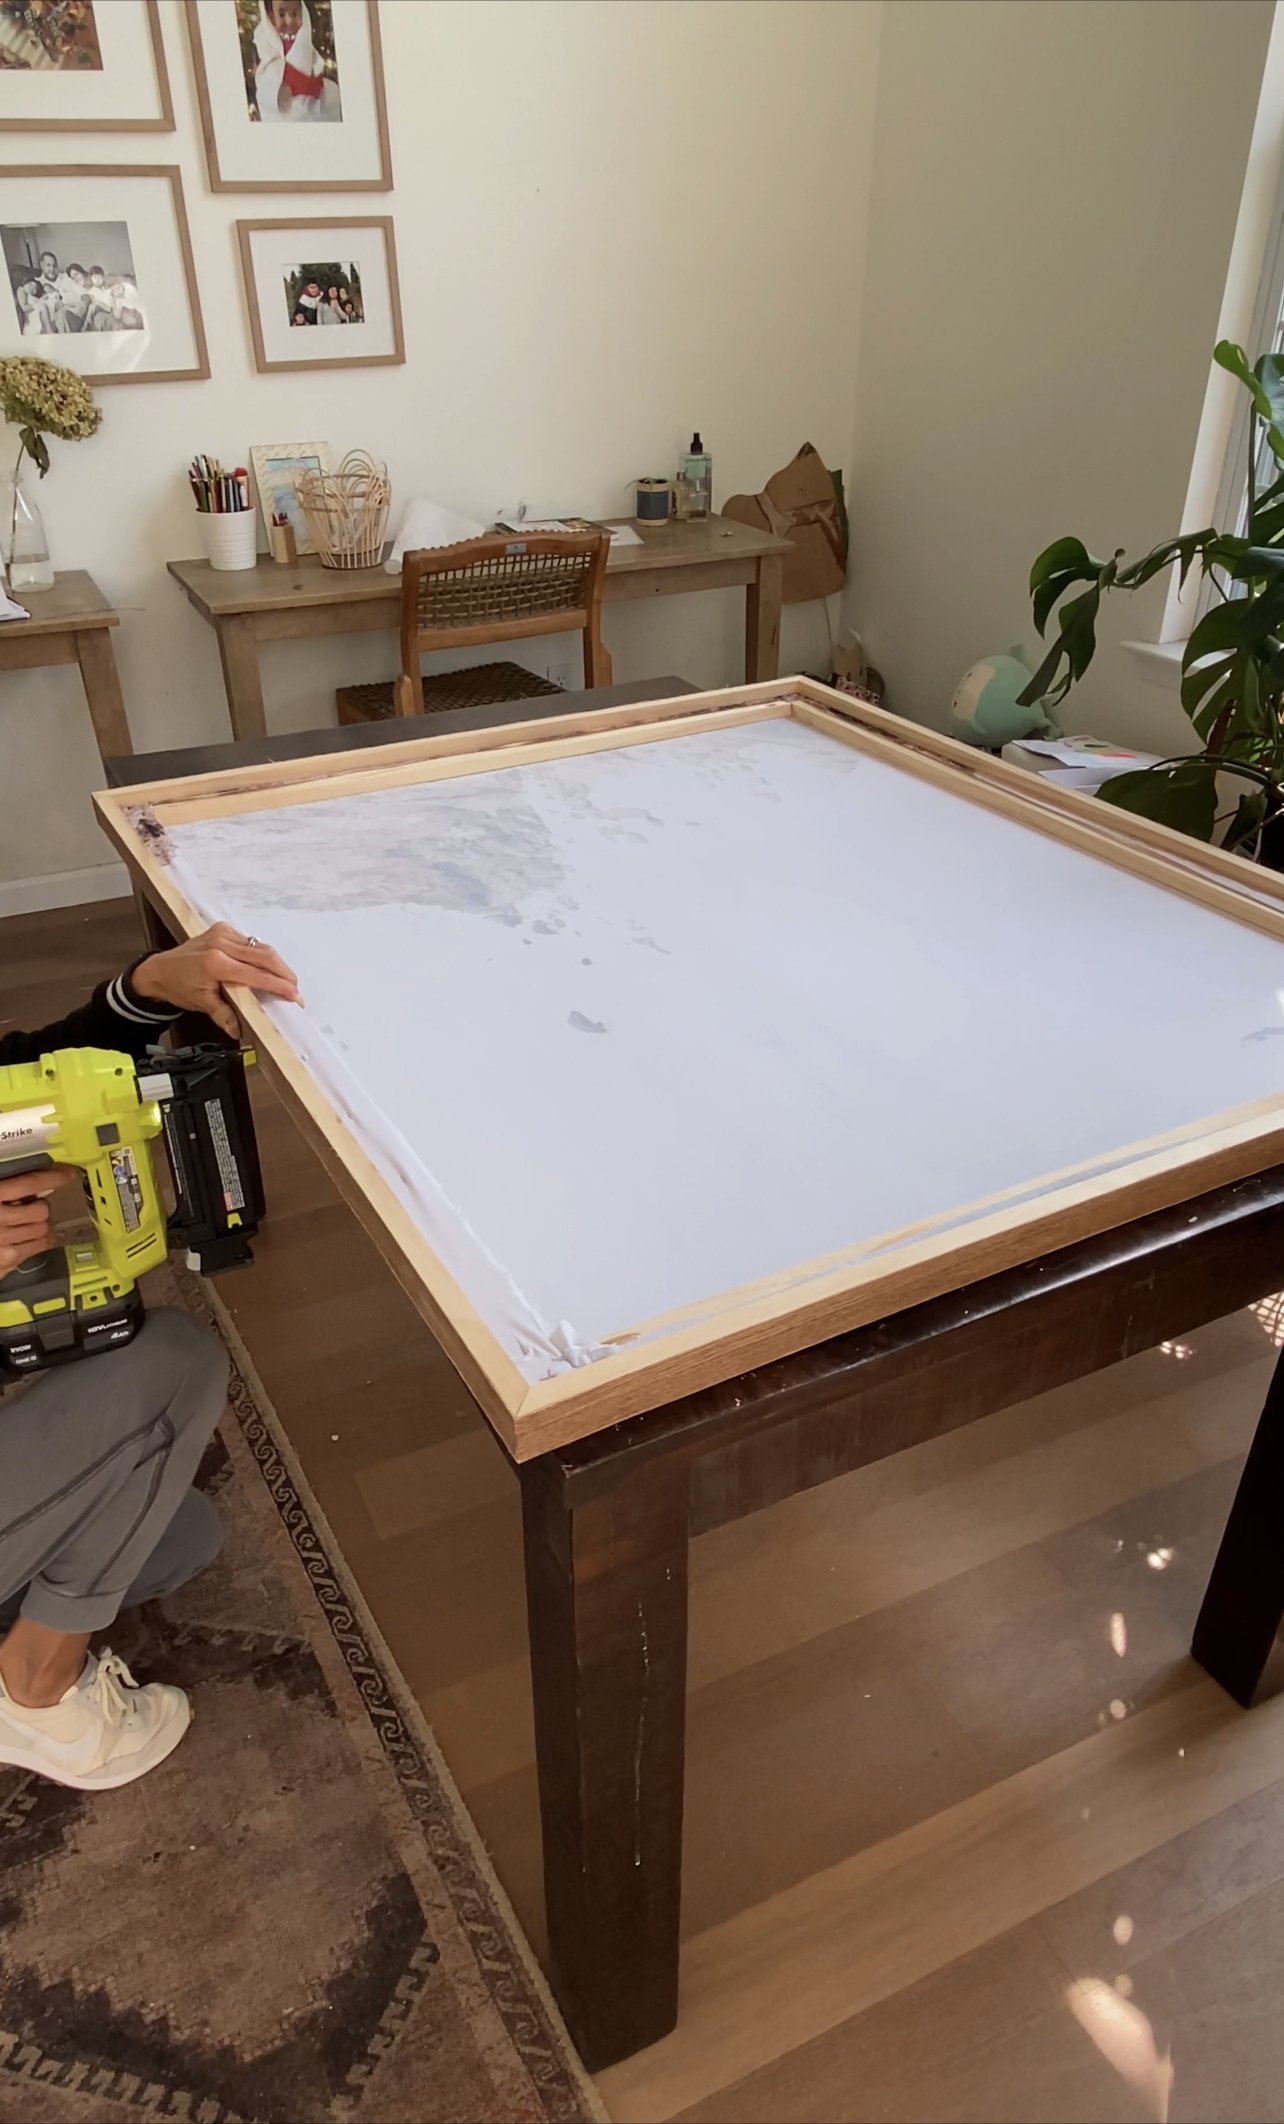
Step 2: Staple your art to frame.
Now that you have your frame built, it’s time to stretch your tapestry and staple it to the frame. You want to start in the middle of each side - stapling once per side. I continued doing this, working my way around the tapestry and frame until I had it all smoothly stretched and stapled.


Step 3: Build outer frame for art.
You could stop right here and leave your tapestry as is! It looks awesome already! I decided to frame mine to really give it a finished look and make the tapestry pop.
I used (3) planks of 1x2x8 select pine for this outer frame. Select pine is a little stronger and nicer than the common board pine that I used to mount the tapestry to. For this frame I mitered (45 degree angle cut) each plank end. I then used the framed tapestry from step 2 to act as a support while I glued and nailed the outer frame pieces together. * Do not nail the outer frame to the framed tapestry yet. Only use the framed tapestry as a guide/support while gluing and pinning mitered frame pieces together. * Here is the nail gun I used.

Step 5: Stain or Edge Band Outer Frame
For the outer frame I really wanted a darker tone to add some contrast. You could stain the pine but pine can easily get blotchy even after using wood conditioner or sanding sealer. To skip all the blotchy pine drama - I opted for red oak edge banding. It’s an iron on real wood veneer that you can stain and lightly sand if needed! I have used it on many projects like my home office!
Before ironing on the edge banding, I stained it first. I used 3:1 ratio of Minwax English Chestnut to Varathane Weathered Oak. Once the stain dried for about an hour, I went ahead a began ironing it on the outer pine frame. The thicker sides of the frame needed two strips of edge banding.
Also - you want to trim any excess edge banding with a razor blade.


Final Step: Nail outer frame to tapestry.
To secure the outer frame I used my brad nailer and 1 1/2” nails. You don’t need to go crazy with the nails here - I used four on each frame side. The dark stain on the edge banding hid the nails perfectly! So no need to wood fill. Now you can this handy 20lb small sawtooth hanger and you are set to go! Total cost for the tapestry + inner frame + outer frame with edge banding and sawtooth hanger (I already had tools and stain)= $85

